Devaten

How To Solve Keptn Issues​​

The Devaten-service is a Keptn service that is responsible for collecting database statistics performed while test sequence executed using Devaten endpoints.

We are going to install the service in the same cluster that Keptn is running in. Checkout also the installation option for Keptn on K3s.

Installation

Before Devaten-service installation there are some prerequisite need to follow.

Deploy Devten database Agent

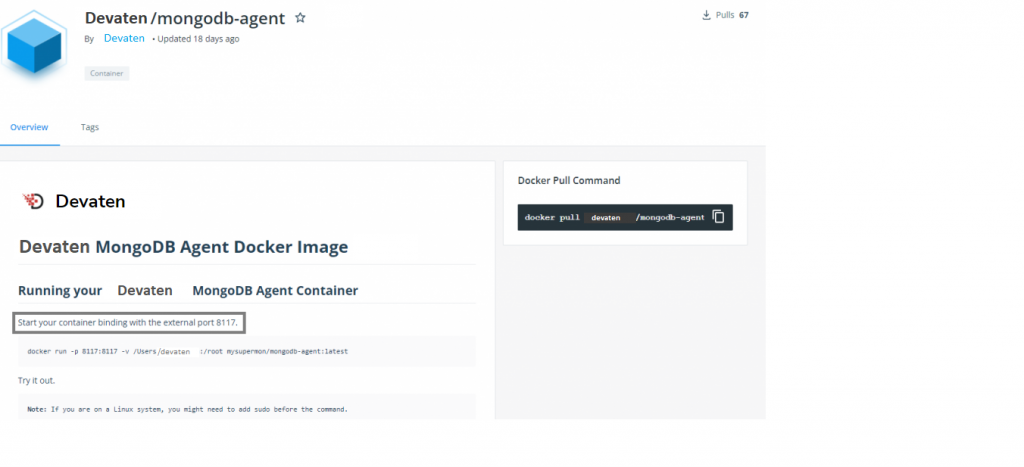
  1. Create a devaten-agent.yaml file and copy below yaml content paste into it. Replace IMAGE_NAME with image name you need, you can find devaten agent images here Devaten Docker hub

    NOTE
    1. Replace AGENT_DATABASE_NAME with the agent supported database name
    2. Replace IMAGE_NAME with image name you need (MySQL, PostgreSQL, MariaDB, MSSQL, ORACLE, MongoDB), you can find devaten agent images here devaten Docker hub
    3. Replace port no with agent supported port you can find it on it’s docker hub overview tab.
apiVersion: apps/v1
kind: Deployment
metadata:
    name: AGENT_DATABASE_NAME-agent
spec:
    replicas: 1
    selector:
        matchLabels:
        app: AGENT_DATABASE_NAME-agent
    template:
        metadata:
            labels:
            app: AGENT_DATABASE_NAME-agent
        spec:
            containers:
            - name: AGENT_DATABASE_NAME-agent
            image: devaten/IMAGE_NAME:latest
            ports:
            - containerPort: 8111  
    2. Apply the devaten-agent.yaml file using below command in the in the same cluster that Keptn is running in.

    kubectl apply -f devaten-agent.yaml -n keptn

    3. After deploying the agent check the logs of agent using below command and copy Agent unique id.

    kubectl logs -f deployment/AGENT_DEPLOYMENT_NAME -n keptn

    ###################################################### Agent Unique Id : 9604729ADE98MONGO-AGENT-DEPLOY-XXXXXXXXXX-9D882190-MONGODB ######################################################

Add Agent, Application Name and Database

  1. Visit to Devaten and log in.

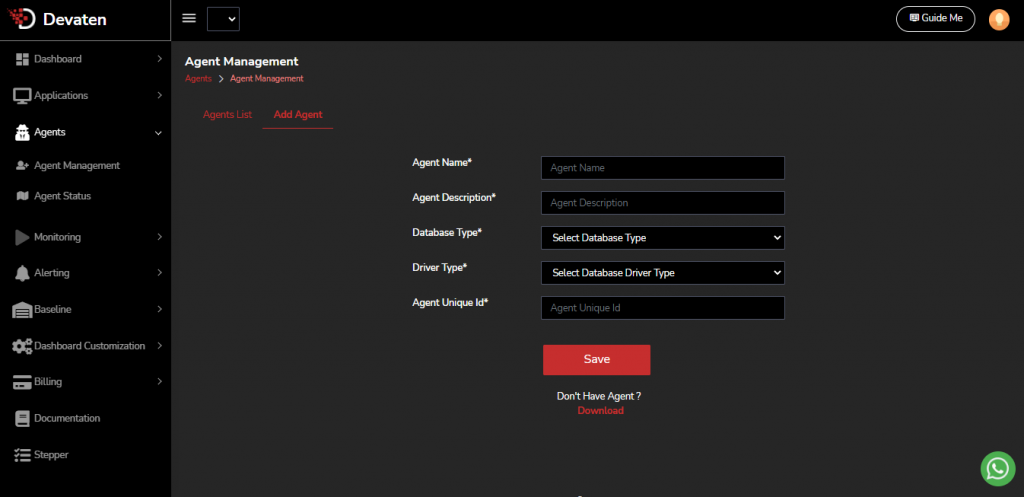
  2. Click on Agent -> Agent Management in the side menu and fill the form. Paste the Agent Unique Id (9604729ADE98MONGO-AGENT-DEPLOY-XXXXXXXXXX-9D882190-MONGODB) in the Agent Unique Id field.

  1. Click on save to add agent.

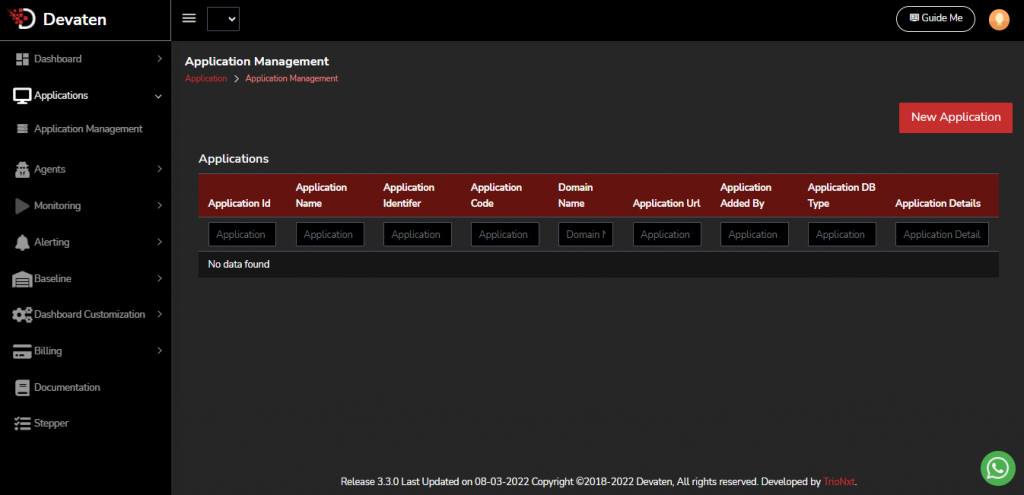
  2. Click on Application -> Application Management and click on the New Application Button on the page.

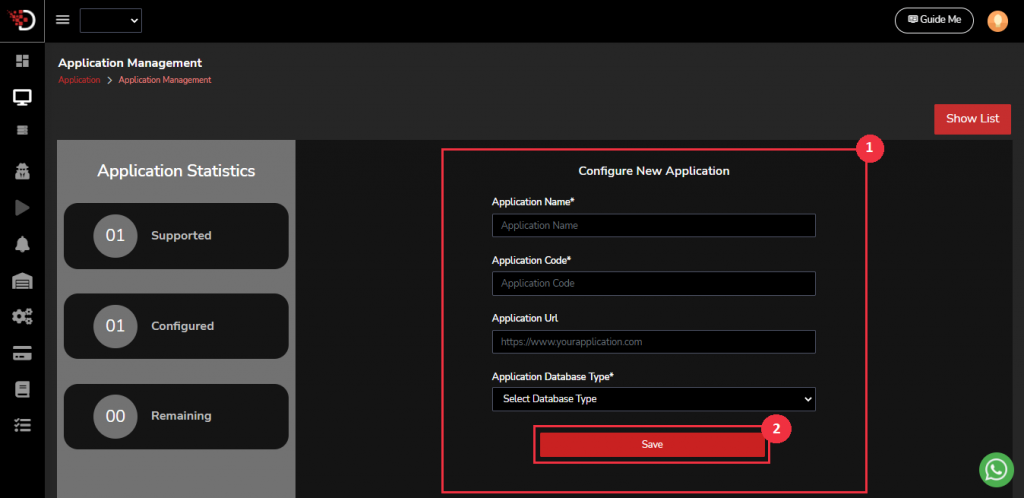
       3. Click on save to add agent.

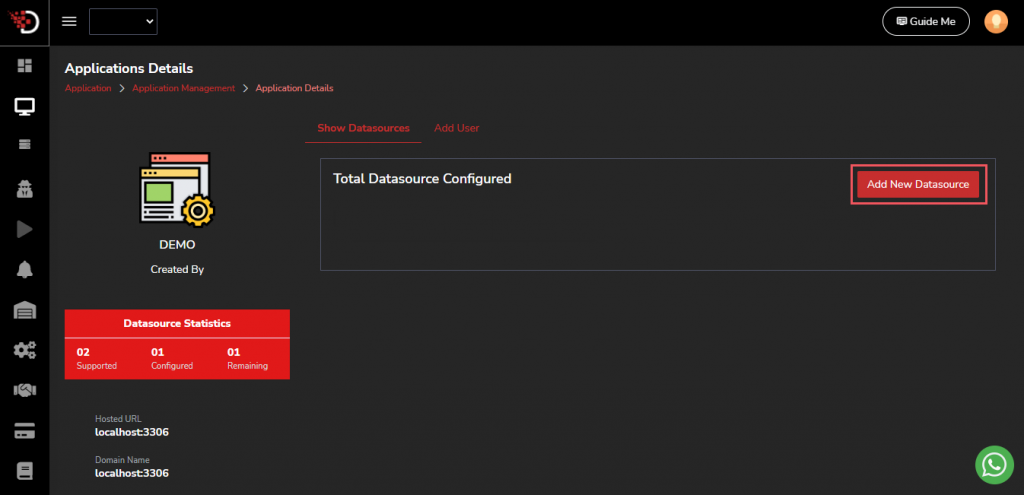
    4. Now click on the added application and then click on  Add New Datasource button to add database.
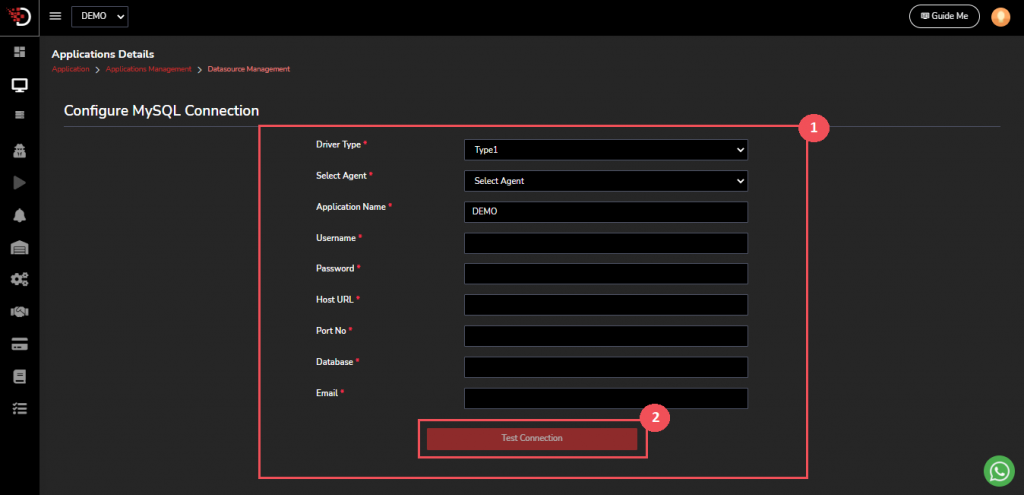
    5. Fill the form by selecting driver type , Agent, Enter Database username, Database password, Host url of Database, Port no. on whitch database is running, database name and email.

    # You can find Host Url using this command
    kubectl get pods -o wide -n sockshop-dev

    NAME READY STATUS RESTARTS AGE IP NODE NOMINATED NODE READINESS GATES
    carts-db-54b449c598-kxggb 1/1 Running 0 62d 10.42.1.20 <== Host Url k3d-mykeptn-agent-0
    carts-76b56b96dd-g9djp 1/1 Running 0 3h6m 10.42.1.54 k3d-mykeptn-agent-0

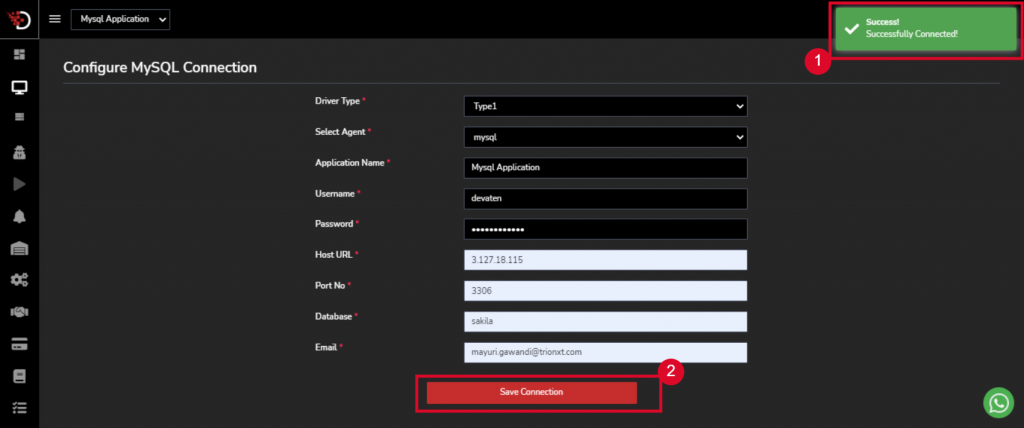
    6. Click on Test Connection after successful connection Click on save connection.

Now we will deploy the devaten Service in the Keptn Cluster.

Deploy Devaten Service

  1. Create a secret using devaten username and password, you can go ahead and copy/paste this next line. Make sure you are connected to the correct Kubernetes cluster.
    kubectl create secret generic devaten --from-literal="devaten_username=YOUR_DEVATEN_USERNAME" --from-literal="devaten_password=YOUR_DEVATEN_PASSWORD" -n keptn
  2. Now clone the Devaten service repo

    git clone https://github.com/keptn-sandbox/devaten-service.git
    
  3. Apply deploy/service.yaml file.

    kubectl apply -f service.yaml -n keptn
  4. Verify Devaten service is running and user authenticated.

    kubectl -n keptn logs -f deployment/Devaten-service -c Devaten-service

    Subscribing to deployment.triggered
    Subscribing to test.triggered
    Found environment variables KEPTN_ENDPOINT and KEPTN_API_TOKEN, polling events from API
    Found environment variables DEVATEN_USERNAME, DEVATEN_PASSWORD, DEVATEN_ENDPOINT
    INFO --> Devaten authentication successful.
    Starting to poll...
    Exit using CTRL-C

Enable Prometheus Monitoring

To enable the prometheus monitoring with Devaten service we need to add scrape jobs to prometheus configmap. But before that we need to setup the prometheus monitoring for that follow this document Setup Prometheus Monitoring.

  1. Edit prometheus configmap using following command.
  2. kubectl edit configmap prometheus-server -n monitoring

  3. Add following scrape job to the configmap scrape_configs:.

    ...
    job_name: devaten-service
    honor_timestamps: false
    scrape_interval: 10s
    scrape_timeout: 10s
    metrics_path: /metrics
    scheme: http 
    static_configs:
    - targets:
            - Devaten-service.keptn.svc:8080
    ...

  4. To verify that the Devaten-service scrape jobs are correctly set up, you can access Prometheus by enabling port-forwarding for the prometheus-service:

    kubectl port-forward svc/prometheus-server 8080:80 -n monitoring

    Prometheus is then available on localhost:8080/targets where you can see the targets for the service:

Usage

The Devaten-service expects Devaten application identifier file in the project specific keptn repo.

NOTE: It is mandatory to provide Devaten_app_identifier.txt before triggering delivery.

Here is an example on how to upload the Devaten_app_identifier.txt file via keptn CLI to the project sockshop:

keptn add-resource --project=sockshop --resource=Devaten_app_identifier.txt

For executing performance or functional test use locust-service or any other service so Devaten can collect database statistics.

Now trigger a delivery for carts service.

keptn trigger delivery --project=sockshop --service=carts --image=docker.io/keptnexamples/carts --tag=0.12.3

Common tasks

  • Deploy the service using kubectlkubectl apply -f deploy/service.yaml
  • Delete/undeploy the service using kubectlkubectl delete -f deploy/service.yaml
  • Watch the deployment using kubectlkubectl -n keptn get deployment devaten-service -o wide
  • Get logs using kubectlkubectl -n keptn logs deployment/devaten-service -f devaten-service
  • Watch the deployed pods using kubectlkubectl -n keptn get pods -l run=devaten-service

Uninstall - Delete from your Kubernetes cluster

To delete the devaten-service, delete using the deploy/service.yaml file:

kubectl delete -f deploy/service.yaml

License

Please find more information in the LICENSE file.

Devaten
Established in 2013 as a software consultancy company, Devaten has worked with finance and healthcare businesses to enhance their software development projects. Taking its offerings to the next level, Devaten built a leading use case-based database application monitoring tool, with a unique approach to performance improvement early during software development. Headquartered in Turku, Finland.

Copyright © 2024 Devaten, All rights reserved.